

Professional Drywall Repair in Aurora, CO

Repairing Screening
Drywall service

Repairing Screening

Repairing Screening This is an excerpt from the Book called “Step-By-Step Household Repairs“. Continue reading to learn more about Repairing Screening, thanks to the author. Holes and tears in screens are among the most put-off repairs around most homes. That’s probably because they’re not as urgent as a leaky faucet or a binding door or some of the other must-do repair jobs. But you can only procrastinate so long because eventually you won’t be able to get fresh air in the house without allowing a horde of pesky flies or mosquitoes in with it.  So if you have one or more screens in need of attention, there’s no better time than now to take corrective action. On this and the next two pages, we show you how to repair both small tears and gaping holes in screening as well as how to replace screening in both wood and metal frames.  Mending Small Holes The tools and materials for screen work are, with a few exceptions, as common home workshop tools as you can find. For mending, you’ll need silicone glue or tin snips and a small amount of aluminum or fiber glass. To replace a wood-framed screen, you’ll need a putty knife, a screw-driver, a staple gun, some scrap wood strips for stretching the replacement screening, a hammer and brads, and a utility knife. For work on metal sashes, you also may need a length of replacement plastic spline. To make screening replacement work easier still, consider investing in a special screening tool.  Mending Small Holes  Very small tears in metal or fiber-glass screening respond well to mending with clear silicone glue. If necessary, dab it on in successive layers until the tear is completely filled. You can β€œdam” small holes in metal screening. Unravel a strand or two from a piece of scrap screening and sew the hole shut, weaving the strands into the sound fabric with a needle.  Patching Large Holes  To repair large holes in metal screening, start by neatly trimming the damage to a ravel-free square or rectangle using tin snips. Now cut a piece of patch screening that is about two inches larger (overall) than the damaged area. Unravel a couple of the patch’s strands on each side and bend them over at a 90-degree angle. Position the patch over the bent wires through the sound fabric. Then bend the wires over to hold the patch in place.  The technique is even simpler for fiber-glass screening. Cut a patch of similar material with scissors and affix it with transparent-silicone glue.  Replacing Wood-Framed Screening  To remove the damaged screening from the frame. Pry up on the wood molding strips with a putty knife. Start with the frame’s center rail, if it has one and work from the centers of the stripe to their edges. Now remove all of the staples you have exposed and lift out the screening. Replacing Wood-Framed Screening fiber-glass screening To cut your replacement screening to the correct size, unroll a length of it and a cut of piece that is several inches wider and at least a foot longer than the frame. Fold over the top edge of the screening about Β½ inch and staple this hemmed double layer as shown here, working from the center to the edges.  Before stapling the remaining edges of the screening in place, you’ll need to make an improvised β€œstretcher” from a pair of 1x2s. Nail the bottom 1×2 to the floor or a bench, then position the bottom of the frame an inch or two away from the 1×2, with the excess screen lying over it. Now nail the second 1×2 a top the first so the screening is sandwiched between them.  Insert two wedges (made by cutting a 1×4 diagonally) between the 1×2 cleats and the bottom of the frame. Now tap the wedges with a hammer until the screening becomes taut. (Tap the wedges gently, alternating sides and being careful to avoid overstretching the screening). Now staple the bottom edge in place, followed by the sides (pull on the fabric to tighten it before stapling), and finally the center rail, if there is one. Again, begin stapling at the centers, and smooth the mesh as you work out toward the edges. Finish the installation by trimming away the excess from the frame sides and bottom with a utility knife. Refit the screen molding with countersunk brads. Fill the recesses with wood filler.  Replacing Metal-Framed Screening  Unlike screens in wood frames, metal-framed screens are held in place by a spline that’s friction-fit into a channel around the perimeter of the frame. Removing a damaged screen is simply a matter of prying loose this spline with the blade of a screwdriver. Cut your replacement screen to the same size as the frame’s outer dimensions, trimming the corners at 45-degree angles (to make them easier to tuck in). Now use a putty knife to bend an edge of the screen into the channel along one side. Secure this edge by driving a spine (the original or a replacement) into the channel with a hammer and wooden block. Have a helper pull the opposite edges taut, then pull the other two taut as you tap in the remaining splines. Trim away the excess screening with a utility knife. Note in the detail the special screening tool that makes this task even easier. (303) 353-0936 [contact-form-7 id=”33″ title=”Quote Form”]

Concrete Molds
Drywall service

About Concrete Molds

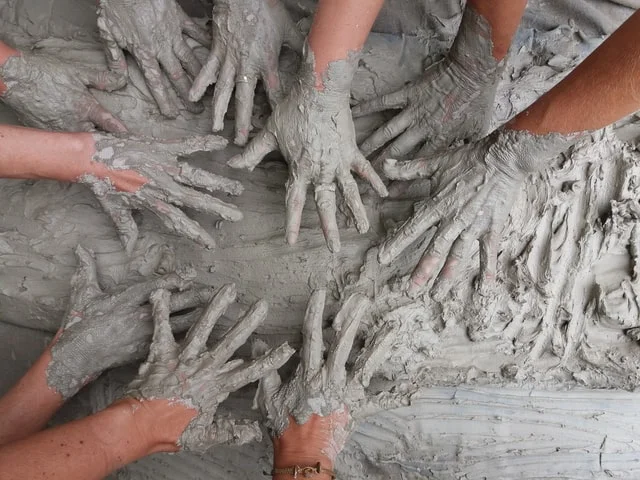
About Concrete Molds This is an excerpt from the Book called “Easy Concrete” by Malena Skote. Continue reading to learn more about About Concrete Molds, thanks to the author. About Molds  It isn’t possible to write about concrete without writing about molds, since they determine how the finished objects will look. You pour concrete into a mold like batter into a cake pan. The concrete hardens in the mold and the finished object takes on the shape of the inside of the mold. This means that when you make molds for concrete casting you have to imagine the negative imageβ€”that is to say, the cavity into which the concrete is poured.   Inspect the mold carefully. What material is it made of? Is the material smooth or matte? Are there trademark symbols that might make an imprint on the concrete? Don’t forget that even price tags left on the surface can leave impression! And remember that the mold has to be strong enough so that it doesn’t collapse when you pour in the wet concrete.  Wooden Molds  Concrete is a somewhat surprising material. When you pour it into the mold you have no control over what will happen. You simply have to be patient and await the exciting moment when you can see your brand new concrete object.  Plastic Molds  Plastic pails, pots, and basins are available cheaply at flea markets and large stores. Save ice cream, cookie, and dairy containers, and ask for empty candy boxes at stores.  When you cast pots or bowls, you usually place a smaller bowl or plastic pot in a bigger one and pour the concrete into the cavity in between the two. So you need to try to imagine the volume of the space in between. How will the proportions turn out? How thick will the walls of the bowl/pot be? The outer (larger) mold’s inside should be as smooth as possible. Are there measurement markings that can leave impressions? For the inner ( smaller ) mold, it is the outside that should be smooth so that it doesn’t get stuck to the concrete. Saw or file away rough edges and tape over draining holes in plastic pots.  And remember that if the mold is flexible and the plastic is somewhat smooth, you won’t need to oil it.  Wooden Molds  Wooden boxes, cases, and plates are available at flea markets and large stores, or you can easily make them yourself from pieces of wood. If you wood is untreated and seems absorbent seal it first; otherwise the wood will absorb the water from the concrete and the concrete surface may turn sandy. Use transparent wood or acrylic sealer. Formwork plywood is especially made for concrete casting and is covered with a film that makes it release the concrete easily. It is sold in largepieces from building-supply companies. If you don’t want such a big piece, you can ask at construction sites for leftovers. Used formwork plywood can usually be scraped clean and re-used. With wooden molds, you get straight corners and sharp edges on your concrete objects, in contrast to the rounded edges you get from plastic molds. A wooden mold must be tight and without gaps, or else the water in the wet concrete will run out and the edges will be crumbly. Screw your mold together, instead of nailing, so the joints will be tighter; it will also be easier to take the mold apart. Formwork plywood is easy to screw into if you first make holes with a sharp awl.  Metal  Although you can make concrete plates on top of metal ones for deeper molds, such as cake pans and saucepans that are rigid and cannot be stretched, the concrete can get stuck. Oiling the mold first with a thin layer of lubricant will help prevent the concrete from adhering to the sides. Avoid using tins because the ridges will hold the concrete fast.  molds for concrete casting mold materials Paper  Ordinary, flimsy cardboard will dissolve in wet concrete, but firm paper, such as paper tubes from building-supply stores and boxes can be used as molds. Milk and juice cartons have waxed interiors that easily release concrete, but they must be supported from the outside so they don’t bow and split when the heavy, wet concrete is poured in.  Silicone And Rubber  Mold silicone and liquid rubber can be used to make molds for more complicated figures, such as animals and fruits. Choose a good original, such as a beautiful apple, cover it in silicone or rubber and let it harden then remove the apple and pour concrete into the mold. Mold silicone and rubber are available in craft stores, art stores, and shops that sell materials for ceramics. Pre-made molds for plaster, soap, and so on can be used for concrete, and they are available in craft shops.  Release Agent  Greasing the mold with lubricant makes it easier to release the finished concrete piece. Cooking oil and petroleum jelly can be used, but they will make the surface of the concrete very porous. A porous surface can be beautiful if that is the effect you are after, but if you want a completely smooth surface, use a thin liquid oil specifically for this purpose (mold oil is available from building-supply stores). Nonstick sprays used for baking and lubricant sprays meant for mechanical machine parts can also be used.  (303) 353-0936 [contact-form-7 id=”33″ title=”Quote Form”]

Installing a Floor-Warming System
Drywall service

Installing a Floor-Warming System

Installing a Floor-Warming System This is an excerpt from the Book called “The Complete Guide To Bathrooms” by Black & Decker. Continue reading to learn more about Installing a Floor-Warming System, thanks to the author. Floor-warming systems require very little energy to run and are designed to heat ceramic tile floors only; they generally are not used as sole heat sources for rooms.  A typical floor-warming system consists of one or more thin mats containing electric resistance wires that heat up when energized, like an electric resistance wires that heat up when energized, like an electric blanket. The mats are installed beneath the tile and are hardwired to a 120-volt GFCI circuit. A thermostat controls the temperature, and a timer turns the system on or off automatically.  Install electrical boxes The system shown in this project includes two plastic mesh mats, each with its own power lead that is wired directly to the thermostat. The mats are laid over a concrete floor and then covered with thin-set adhesive and ceramic tile. If you have a wood subfloor, install cement-board before laying the mats.  A crucial part of installing this system is to perform several resistance checks to make sure the heating wires have not been damaged during shipping or during the installation.  Electrical service required for a floor-warming system is based on size. A smaller system may connect to an existing GFCI circuit, but a larger one will need a dedicated circuit follow the manufacturer’s requirements.  To order a floor-warming system, contact the manufacturer or dealer. In most cases, you can send them plans and they’ll custom-fit a system for your project area.  Floor-warming systems must be installed on a circuit with adequate amperage and a GFCI breaker (some systems have built-in GFCIs) Smaller systems may tie into an existing circuit but larger ones need a dedicated circuit. Follow local building and electrical codes that apply to your project.  Check the resistance value (ohms) of each heating mat, using a digital multi-tester. Record the reading. Compare your reading to the factory-tested reading noted by the manufacturerβ€”your reading must fall within the acceptable range determined by the manufacturer. If it does not, the mat has been damaged and should not be installed; contact the manufacturer for assistance.  Install electrical boxes for the thermostat and timer at an accessible location. Remove the wall surface to expose the framing, then locate the boxes approximately 60” from the floor, making sure the power leads of the heating mats will reach the double-gang electrical box. Mount a 2 Β½ β€œ-deep x 4”-wide double-gang electrical box (for the thermostat) to the stud closest to the determined location, and a single-gang electrical box (for the timer) of the stud.  Use a plumb bob to mark points on the bottom plate directly below the two knockouts on the thermostat box. At each mark, drill a ½” hole through the top of the plate, then drill two more holes as close as possible to the floor through the side of the plate, intersecting the top holes. (The holes will be used to route the power leads and thermostat sensor wire.) Clean up the holes with a chisel to ensure smooth routing.  Cut two lengths of Β½ β€œthin-wall electrical conduit to fit between the thermostat box and the bottom plate, using a tubing cutter. Place the bottom end of each length of conduit about ΒΌ β€œinto the holes in the bottom plate, and fasten the top end to the thermostat box, using a setscrew fitting. NOTE: If you are installing three or more mats, use ΒΎ β€œconduit instead of Β½ β€œ.  Electrical service floor-warming system Run 12-gauge NM electrical cable from the service panel (power source) to the timer box. Attach the cable to the box with a cable clamp, leaving 8” of extra cable extending from the box. Drill a 5/8” hole through the center of the stud, about 12” above the boxes. Run a short branch cable from the timer box to the thermostat box, securing both ends with clamps. The branch cable should make a smooth curve where it passes through the stud.  Vacuum the floor thoroughly. Plan the ceramic tile layout and snap reference lines for the tile installation. Spread the heating mats onto the floor with the power leads closest to the electrical boxes. Position the mats 3” to 6” away from walls, showers, bathtubs, and toilet flanges. You can lay the mats into the kick space of a vanity but not under the vanity cabinet or over expansion joints in the concrete slab. Set the edges of the mats close together, but do not overlap them: The heating wires in one mat must be at least 2” from the wires in the neighbouring mat.  Confirm that the power leads still reach the thermostat box. Then, secure the mats to the floor using strips of double-sided tape spaced every 24”. Make sure the mats are lying flat with no wrinkles or ripples. Press down firmly to secure the mats to the tape.  Create recesses in the floor for the connections between the power leads and the heating-mat wires, using a grinder or a cold chisel and hammer. These insulated connections are too thick to lay under the tile and must be recessed to within 1/8” of the floor. Clean away any debris, and secure the connections in the recesses with a bead of hot glue.  Thread a steel fish tape down one of the conduits, and attach the ends of the power leads to the fish tape, using electrical tape. Pull the fish tape and leads up through the conduit. Disconnect the fish tape, and secure the leads to the box with insulated cable clamps. Cut off the excess from the leads, leaving 8” extending from the clamps.  Feed the heat sensor wire down through the remaining conduit and weave it into the mesh of the nearest mat. Use dabs of hot glue to secure the sensor wire directly between two blue resistance wires, extending […]

Design Ideas Using Stone
Drywall service

Design Ideas Using Stone

Design Ideas Using Stone This is an excerpt from the Book called “Design ideas for decorative Concrete & Stone“.Continue reading to learn more about Basic Design Ideas Using Stone, thanks to the author. Since people first began harnessing nature to build walls, dwellings and weapons natural stone has been a material of choice-easily mined when quarries were discovered and easily cut and shaped with even the most basic tools. Indeed stone is as old as planet earth. The minerals that abound in naturals stone evolve from the same minerals, liquids, and gases that pushed up to the face from within its core eons ago. Expert craft people now are able to manipulate stone for almost use. Cutting and casting are only two methods of creating stone product.  Rough And Smooth  Whatever its origins and whether it’s hard or soft stone possesses raw beauty enhanced by its ability to be manipulated. Natural stone occurs in the earth in a great many forms, but a few are more common than others. Sedimentary stone results from the actions of oceans, rivers, wind and glaciers, creating enough pressure to allow rock beta to form. Metamorphic stone evolves from the impact of minerals, intense heat and pressure evolves from the impact of minerals, intense heat, and pressure to turn one type of stone into another. Igneous stone has volcanic origins. When boiling lava cools beneath the earth’s surface, mineral gases and liquid minerals penetrate the stone, creating new crystalline forms.  Like Clay in an Artist’s Hand  Variations in texture and pattern were achieved here by unique arrangements of shaped and colour stone veneers. These table tops present a sampling of possibilities –mosaic stones arranged in acquires and diamonds, plus solid borders. Placed either indoors or outdoors, they should be coated with a penetrating sealer-to prevent stains and discoloration-and wiped regularly with a clean, soft cloth.  Walkways  Step on it. Whether individual pieces shaped by nature are sets on the ground to form a footpath or carefully cut units are arranged in planned pattern, stone is a natural choice when producing a surface in which to walk. It’s hardy unaffected by weather and resilient. Stone can be manipulated to create varying shapes and finishes, but all tonal differences are achieved in nature: high temperatures and varying pressures under the earth’s surface act in different minerals to create the stone colours, for unpatrolled variations.  Walkways  Sizes And Shapes   Machines make the difference. These pebbles and stones look as though they are lifted from an active river box and shaped over thousands of years. The examples, below, in different colour and shape variations, were produced by steel blades, then honed to create smooth surfaces. When used decoratively, honed surfaces are more porous and less vividly colour than polished stone, which is so smooth it’s rarely used outdoors.  Coloration  Sandstone has been used extensively in buildings for over 100 years because of its uniform texture. Below, stone samples in yellow-brown and yellow-pink with natural cleft surfaces show the possibilities of using various colours and tones for an appealing look.  Kitchen Cavalcade  Whether you’re surfacing a kitchen floor or a countertop, stone is a likely choice because of its versatility and rich coloration. Stone floors are cut tiles that are grouted for a smooth surface   Any type of countertop edge treatment is possible, even with these hardest stone. Stone countertops are crafted from slabs-usually in 5* 8 –foot sixes. For counters or island surfaces longer than 8 feet seams are required. But skilled fabricators can about adjoining slabs and grout them so effectively that the seams seem virtually invisible.  Edge Options  When you are choosing an edge treatment one of the things to consider is the style of your kitchen. You will want this important finishing detail to complement the room’s overall look. However slab thickness will ultimately determine what edge choices are possible.  Edge Options For a thin stone countertop, a straight edge is the usual choice, although it may be possible to have a radius edge is the usual choice, although it may be possible to have a radius edge, which has a slightly curve at the top. Thicker stone surfaces allow you to choose one of these more common edge treatments:  Bevel- a slight angle in the top 35 of an edge  Bullnose- an edge carved into the shape of a half- circle.  Half bullnose- an edge with a sweeping curve, like a quarter4-circle.  Pencil- a nearly straight edge but with a less pronounced curve  Stepped bullnose- a standard bullnose with a notch at the top.  Ogee- a truly elegant edge, shaped like an elongated β€œs” curve  Bath Bonanza  The bathroom is where natural stone in many of its forms and finishes is used lavishly for both a dramatic and practical effect –on walls, floors, sinks, counters, and often even on tubs. Whether a hard granite is selected or a softer more porous marble or limestone natural stone makes a strong statement-in its veining and its colour variation founds in nature in ancient and new quarries in various parts of the world-stone represents an uneven image as no two pieces are ever exactly alike. For many people, these differences and apparent imperfections only add to its appeal. These bathroom fixtures all made from natural stone scan inspire you. With the limitless ways of handling stone perhaps you will dream up your own design for a very individual custom order.  Care Giving  For longevity, stone should be protected with a penetrating sealer, applied before initial use and periodically thereafter. Floors should be swept regularly, then mopped with a solution of mild detergent and water; after a warm-water rinse, the surface should be allowed to dry thoroughly to prevent streaking.  Waxing any stone floor will produce a perilously slippery surface.  Avoid using bleach, vinegar, or ammonia, and never rub on abrasive cleansers. Mop up of sponge all spills as soon as possible to prevent the possibility of permanent staining rust spots can be challenging, particularly on surfaces that […]

Building Mold with Integral Elements
Drywall service

Building Mold with Integral Elements

Building Molds with Integral Elements AdvancedΒ  Building Molds with Integral ElementsΒ  Plotting The Counter And Radius EdgeΒ  Plan view: 2” thick countertop with sink& drainboard (Drawing Not To Scale)Β  Use a straightedge to draw a line 15 inches from the edge of a 4’ Γ— 8’ sheet of melamine, allowing the counter to have plenty of room on all sides.Β  Find the center of the 71-1.2”-long countertop and mark.Β  Draw the centerline.Β  To create the curved front, you need a long compass, and you need to continue the centerline back far enough to get a radius of about 12 feet. A second worktable will allow you to extend the line.Β  Use a long straight edge and a pencil to mark the centerline’s continuation.Β  Figure out the width of the countertop and measure from the centerline to each side.Β  Mark the edges. Note that the countertop length is a half inch shorter than the shelf slot allotted in the base so that it will slide in to its slot. Make a 1/4″ allowance on each side.Β  Using your T-square pivot and draw the sides of the radius countertop.Β  Our compass is set to 10’× 9’ we calculated this on graph paper before hand and then adjusted then adjusted it. While was actually making the mold tried 8’ and then went to 10’ and wound up with 10’×9’ by looking at it and finding a curve that looked right for me. The drawing that you see reflects the final decision. Plotting The Counter And Radius EdgeΒ  Β A close-up shows the writing end of the compass, created using a standard clamp available in hardware stores.Β  Tap the far end of the compass lightly into the board below to anchor it.Β  Plan View With CompassΒ  For Radius EdgeΒ  (Drawing Not To Scale)Β Β Β  Draw the radius edge carefully. It helps to have someone holding the pivot in place.Β  Plotting The Integral Sink And DrainboardΒ  We will be using a fiberglass sink mold manufactured for Buddy Rhodes Studio.Β  Carefully measure the center of the sink mold. Here the bottom of the fiberglass mold is shown. Because it’s flat, the measuring starts here. Β  Use a straight edge to carry the centerlines to the sides and to the front. Mark the centerlines on all four sides.Β  Measure 5” back from the front edge of the countertop and mark the position of the front edge of the sink at the centerline.Β  Center the sink mold on the melamine board and trace around it.Β  At the sides, locate the centerline on the sink mold and mark it on the melamine.Β  Extend the lateral centerline across the melamine. Measure 14” from the side of the sink and mark it on the lateral centerline. This will be the far side of the integral drainboard. Use a T-square to create a straight line, intersecting the lateral center line at 14” from the sink edge. Mark along this line at 8” from the lateral centerline. Creating the 16” flange at the far side of the integral drainboard.Β  Along the sink edge, measure 6” from center and mark at each end, creating the 12” width of the integral drainboard beside the sink.Β  Plotting The Integral Sink And Drainboard Plan View With Compass Now connect the dots.Β  The flared shape of the integral drainboard and the outline of the sink are now penciled in. The darker lines represent the drainboard area, which will be cut out. Repeat this process on the opposite side of the sink.Β  Drill a hole just inside the line of the sink where it intersects with the drainboard, in order to insert the jigsaw. Do the same at the other corner and at one of the outer corners of the drainboard, staying inside the outline of the drainboardΒ  Use a jigsaw to cut out the drainboard area. The drainboard should lift out like this. Mark the first drainboard area β€˜left’ or β€˜right’ so you’ll know where it goes later.Β  Remove the two drainboard areas.Β  Place newspaper under the holes to prevent attaching the mold to the table with resin.Β  Place a length of wood 1/2″ thick against the sink profile to act as a wedge.Β  That 1/2-length of wood creates the drainboard slope when the cutout is placed back in its hole.Β  Mix a polyester resin (Akemi, Touchstone, Tenax) with catalyst.Β  You want something that has body, and won’t fall into the cracks. This bonding resin is used for marine applications and can be found in hardware stores.Β  After mixing, use the resin to butter the sides of the drainboard hole and the half inch wedge board.Β  Place the drainboard mold and remove the excess resin. Repeat the same on the opposite side.Β  Fill in the cracks and the pre-drilled holes with resin. Then wait about half an hour for the resin to dry. Lacquer thinner can be used to remove excess resin. It will remove the pencil marks, so you want to be careful about that.Β  Apply Bondo with a 2” putty knife to create the angles at the sides of the integral drainboard.Β  Use a larger putty knife to finish application to cure for about an hour.Β  Carve away the excess Bondo using a putty knife.Β  Sand the first application of Bondo with a coarse sandpaper on a block.Β  Apply a second coat of Bondo to fill voids and perfect the angles.Β  Use a palm sander to smooth the drainboard mold.Β  Spray the Bondo areas of the mold with a shellac-base white primer. By making it the same color as the melamine, it allows you to see the deviations and bumps. And it looks nice.Β Β  Β  (303) 353-0936 [contact-form-7 id=”33″ title=”Quote Form”]

Silencing Floor and Stair Squeaks
Drywall service

Silencing Floor and Stair Squeaks

Add Your Heading Text Here Silencing Floor and Stair Squeaks This is an excerpt from the Book called “Step-By-StepΒ HouseholdΒ Repairs“. Continue reading to learn more about Silencing Floor and Stair Squeaks, thanks to the author. Every house has at least one: a floorboard or stair tread that groans and creaks every time it’s stepped onβ€”and always the loudest when you go to make a midnight raid on the refrigerator.Β  Quieting those annoying squeaks is mainly a matter of locating them, then securing boards or stair components that have loosened and are rubbing against each other. If you’re lucky, you’ll have access to these trouble spots from below. If not, don’t worry; we’ll show you how to tackle them from above, too.Β  Replacing Damaged Wood FlooringΒ  Silencing Floors From aboveΒ  With hardwood floors, drill angled pilot holes wherever needed, then drive spiral-shanked flooring nails into the subflooring. Set the nailheads and fill the recesses with color-matched wood putty. For carpeted floors, pull back the carpeting and pad, then drive ring-shank nails into the floor joists beneath the squeaky floor. Silencing Stairs From AboveΒ  To fasten down the front edges of a tread, drive spiral-shanked flooring nails at an angle into predrilled holes as shown. If you can round up a helper, have him or her stand on the tread as you nail. Next, set the nails and conceal the holes with wood putty. To eliminate squeaks at the back edge of a tread, drive one or more wedges of scrap wood (coated with glue) into the gap between the treads and risers. Later, trim away the protruding wood.Β  Silencing Floors From BelowΒ  Enlist a helper to walk on the finished floor above while you look for movement of the floor joists and of the subfloor from below. When you locate the problem area, first check to make sure that diagonal bridging between your floor joists (if any is nearby) is film. Snugging it up may solve the problem. If the noise comes from between the joists, drive a tight-fitting piece of solid bridging up between the joists until it makes contact with the subfloor, then end-nail it in place.Β  To silence a subfloor that has worked away from the joists, drive glue-coated shims into the gaps between the subfloor and the joists. Silencing Stairs From BelowΒ  Squeaky stair treads that have parted company with their risers respond quite well to treatments from below. First drill pilot holes through the small blocks of 2×2 for the wood screws that will attach to both the tread and the riser. Then coat the contacting surfaces of the blocks with wood glue and drive the screws in both directions. Wood Floor RepairsΒ  Silencing Floors Other Wood Floor RepairsΒ  On the previous two pages you learned how to silence your wood floors. Now we’ll show you ways to restore their natural good looksβ€”whether that involves smoothing away annoying scratches or replacing whole sections of damaged boards or tiles.Β  In both cases your success depends on how well you match your repair to the surrounding floor. So be sure to exercise all due care when removing the damaged flooring and when selecting stains and replacement boards or tiles. When purchasing new wood flooring, take a sample of what you have now so the salesperson can provide you with an exact match.Β  Hiding ScratchesΒ  To hide minor imperfections on waxed or varnished floors, first try rubbing the scratched areas with a rag moistened with stain that approximates the stain on your floor. For surface cuts that don’t β€œdisappear” when you treat the surface with stains, use steel wool and a solvent such as cleaning fluid. Realize, however, that if you apply solvent, you’ll need to rinse, then refinish, the treated area.Β  You can lift off most food stains and heel and caster marks by buffing the surface with the grain, using fine steel wool moistened with mineral spirits. This technique works especially well for oil-finished wood floors. With acrylic finishes, you’ll also need to refinish the area you’ve abraded. Replacing Damaged Wood FlooringΒ  To remove one damaged floorboard, make several cuts down the center of the board with a circular saw. Adjust the cutting (continued). (303) 353-0936 [contact-form-7 id=”33″ title=”Quote Form”]

Gutters and Eaves
Drywall service

Gutters and Eaves

Gutters and Eaves Gutters and Eaves This is an excerpt from the Book called “Roofs & Siding” by Des Moines, Iowa.Continue reading to learn more about Gutters and Eaves , thanks to the author. The area below a roof overhang-gutter and eave territory-is a common trouble spot. This chapter will guide you through repairs to fascia and soffits as well as show you how to repair and install gutters.   Water running of the roof should flow over the roofing, then over the drip-edge flashing and directly into gutters and down the downspouts. When everything is working the fascia and roof sheathing will stay relatively dry. However in an imperfect world, flashings may be poorly installed, roofing may fail, and gutters may overflow or leak. Any of these conditions can soak the fascia, the soffits, and perhaps the ends of rafters and roof sheathing as well.  If you see signs of damage to your eaves, run a hose on the roof to check that the drip-edge flashing and gutters are installed correctly, so that water flows into the gutter and does not seep into the sheathing or fascia. While the water is running, watch the gutter a d downspouts for leaks and make needed repairers. Also check that the roofing is sound) and make any needed repairs or replacements. If ice dams form during the winter, they are likely the culprit take steps to ventilate the attic or otherwise protect against the dams.   You will likely need to remove the gutters to repair or replace fascia and soffit boards. If the gutters are in less than excellent condition, this maybe the time to replace them if boards are only water-stain end or if rot is only in small spots, you may choose to apply wood hardener and epoxy filler. If the damage is deep or wide, replace all or part of the board.  Whenever you remove a board, take time to check for further damage underneath it. If the area is wet, allow it to dry thoroughly before proceeding. If rafter ends are slightly rotted, you may be able to solve the problem by applying wood hardener. Otherwise it may be necessary to cut the ends short and perhaps to add reinforcing β€œsister” pieces alongside. Use pressure-treated lumber when replacing any wood pieces. Gutter Guards Fascia and Soffit Repairs  Along the eaves you will often find fascia boards covering the ends of roof rafters as well as soffit boards (or sheets of plywood, aluminium, or vinyl) covering the underside of the eaves. A gutter usually is attached to the fascia (see for gutter repairs and installation).  Fascia boards can get soaked with rainwater if the drip-edge flashing is damaged or incorrectly installed or if the roofing itself fails.  If this leads to rot, fascia boards need to be replaced. This does not call for special skills, but the work can be a bit messy. Be sure to work on a stable ladder or scaffolding and be careful not to lean too far to one side of the ladder while you work.  Replace old boards with pressure-treated 1x lumber or plywood. It doesn’t cost much more than untreated wood and it will help prevent rot.  Repairing fascia  Remove an entire board or cut alongside a rafter with a reciprocating saw to remove the damaged portion of a board. Pry the fascia away using a flat pry bar and a hammer. Take care not to dent the soffit or other boards while you pry. You likely will need to pry out the bottom first, and then pry the board down from the roof.  Pull out or pound in any exposed nails.  If the board meets another board in the center of a rafter, you can attach the new board in the same way. For greater strength cut a short 2×6 or 2×4 and install it alongside the rafter to provide more nailing surface. Attach with deck screws.   Check for further rot and replace the drip edge if needed. Near the top of where the replacement board will go, attach a taut string to use as a guide for straightness. Cut a new fascia piece to fit.  Tap it up into position (if it is long have a helper hold the other end) and attach it to the rafter ends with nails or screws.  You choose a scarf joint?  A scarf joint is a good idea if the fascia is highly visible, and you may need to match an existing scarf joint. This is typically done by cutting the board at a 45-degree bevel, but 22 Β½-degree bevels are also use. Cut a scrap piece to make sure the angle is right. Drill pilot holes before driving nails. Dealing with rot in soffits, sheathing, and rafter ends  If the roofing or flashing has failed, more than just the fascia may be damaged. The roof sheathing, soffit boards, and even rafters may have rotted as well. After removing the fascia poke all the exposed wood with a screwdriver; if the tip sinks in easily, the board is rotted. If the rot on a board is only half an inch or so deep, it’s usually okay to leave the board in place. Dry the area out and replace any other boards and flashings as needed to keep the area dry. If several rafter ends are rotted, you may need to uniformly trim 2 inches or so from them. Work carefully so they will all be the same length and angle. Or install β€œsister” 2xboards alongside the rafters and attach the fascia and soffit to the sisters.  Soffit repairs  If a portion of a soffit is damaged, draw a straight line alongside the framing nail heads will likely show you where ranking members are) and cut with a reciprocating saw or hand keyhole saw. Remove the entire board (which wills no longer than 8 feet if it is plywood).  Pry out any molding covering the edges of the soffit board. Use a flat pry bar, then your […]

Developing A Project Plan
Drywall service

Developing A Project Plan

Developing A Project Plan This is an excerpt from the Book called “Interior Walls, Framing, Drywalling, Trimming” by Des Moines, Lowa. Continue reading to learn more about Developing A Project Plan, thanks to the author. Remodeling a house, or even just a room within a house, disrupts daily home life and requires hard work and money, making it well worth the time it takes to plan the project before you begin. A good plan reveals problems before they happen and suggests solutions that might not have occurred to you otherwise.  The first part of developing a remodeling plan is to put together a program.  A program is a list of the results you would like to accomplish by remodeling. Try to be as objective as you can when working on the program. If you start out listing β€œmore closet space,” you are likely to be locked into developing a plan for closets. If, however, you list β€œmore storage space,” you may discover a better, more workable solution than an additional closet provides.  Once you have your program, draw a floor plan of the existing space and make copies of it using tracing paper overlays. Sketch in ideas that accomplish the goals defined in your program. Draw each idea on a different copy of the floor plan to compare or combine them.  When To Involve The Building Inspector  Almost every community has some kind of building code: a set of rules that spell out who can build what in a house, and what standards a construction job must meet. While the requirements can seem a nuisance, building codes are worthwhile-they protect everyone from shoddy work and potentially dangerous construction practices.  When To Involve The Building Inspector  Rules vary from community to community. In some areas, for example, anyone can do electrical wiring, as long as it is inspected.  In other areas, inspections are only required for jobs costing more than a certain amount. Some areas allow you to do your own work; others require a licensed electrician.  To stay on the right side of the law, the best thing to do is to call your local zoning or code enforcement office. Find out exactly what is allowed in your community and what you must do to comply. You may even want to set up an appointment to talk with a building inspector about your project.  If you do meet with an inspector, wake up a list of questions to ask ahead of time. While most inspectors are happy to point you in the right direction, they are busy and will appreciate it if you have thought out what you need to know ahead of time.  Key questions to ask are:  Do I need a permit to build the project I have in mind?  What information will I need to provide to apply for the permit?  If I need to supply drawings, do they need to be signed by an engineer or architect?  What inspections will I need?  How do I arrange for an inspection?  Is there anything I am forgetting to ask?  Start by drawing a floor plan of the existing space on graph paper.  Most of the time, a scale of ΒΌ inch to 1 foot allows plenty of detail without being so big that you need a large piece of paper.  Show all the walls, doorways, and windows. Once you have completed your floor plan, make tracing paper overlays to test out possible designs. Avoid erasing-if you make a mistake or if you don’t like the way something looks, just make another overlay. When you are happy with your new floor plan, make a scale elevation of the new design. An elevation is a view of a wall’s face. The same ΒΌ-inch-to-1-foot scale works well here. Create an overlay for the elevation drawing. On it show the framing that you will be doing and include the critical dimensions of the new design.  If there are problems or special circumstances, note them in the margins. Use your framing diagram to make up a materials list. Keep in mind the bottom plate of a wall runs the length of the wall even if you plan to include doors. You’ll cut the part that runs across the doorway after the wall is in place. Thinking About Light And Traffic  Any time you build new walls, whether to divide an open basement into rooms or to rearrange other living spaces, you alter the dynamic within your home. Some changes are obvious-you now have an office instead of a desk tucked away in a corner. Others are much subtler-the basement is now a lot darker because the only window is in the new office.  Subtle changes can be tough to predict, and therefore, hard to plan around. But there are two that you specifically need to consider: how your alterations will affect traffic flow. Thinking About Light And Traffic  As you plan, sit in the space at different times of the day and note how light enters the room. Perhaps your plan to divide a room allows plenty of windows in both new spaces, but are you blocking morning sun from the new breakfast nook? What can you do to keep the alteration from having a negative impact on the space?  Can you add interior windows or a half-wall partition that lets the light continue to penetrate deeply into the space?  Filling the top half of the wall with glass blocks is an effective way to create privacy without blocking light.  Traffic is the other issue that deserves serious consideration. Will your proposed change redirect traffic through your house?  Will the kitchen suddenly become the preferred thoroughfare to the back door? It may be worth marking off the proposed spaces with tape, or even cardboard, to try out various arrangements before settling on the final plan.  Is This Wall Structural?  As you plan a remodeling job, you’ll begin to see your house in a new light. Things that appeared permanent before-walls, for example-may not […]

Ceilings
Drywall service

Ceilings

Ceilings Ceilings This is an excerpt from the Book called “Improvement and Renovation“ by Bob Vila. Continue reading to learn more about Ceilings, thanks to the author. Creating any new living space usually involves installing or replacing a ceiling.  Simply patching the existing surface is often less satisfactory in the long run than putting in a new one, and sometimes patching is just as much work.  For one thing, a new ceiling lets you have the kind of overhead material that both suits your taste and matches the uses you plan for the room.  In many cases a new ceiling can make up for architectural deficiencies. Dividing a room, for example, may make the ceiling too high for the room’s size; lowering the ceiling restores proper proportions.  Recessing light fixtures in it can make a low ceiling seem higher.  Soundproofing a ceiling can deaden the upstairs or downstairs din and adapt a room for quiet uses such as a study.  Planning and preparation, essential to any home-improvement project, is especially important in the case of ceilings.  Supporting a new ceiling is not complicated.  Most ceilings are simply attached directly to the joists supporting the floor of the room above, or to furring strips nailed across the joists at intervals.  Where no ceiling joists exist, as in an attic, you can nail horizontal collar beams across the rafters and attach the ceiling to them.  Hanging a suspended ceiling (below) requires little more technical skill than hanging a picture; prefabricated snap-together metal strips strung from the joists provide a framework for drop-in panels.  Fluorescent lighting can be incorporated into a suspended ceiling, giving added function to a room’s ceiling.  Suspended A Ceiling   Suspended ceilings are usually made of 2-foot-by-4-foot acoustical panels supported by a metal grid.  This framework consists of long main runners connected at 4-foot intervals by 2-foot cross Ts.  The runners are usually hung at right angles to the joists and are held up by hanger wires attached to the bottom edges of the joists.  The outer edges of the ceiling are supported by edge framing, which is L-shaped in cross section, and which is attached to the walls with the vertical stroke of the L uppermost.  Suspended A Ceiling   Both the hardware-framing, runners and hanger wires-and the acoustical panels are adaptable to all room sizes and designs.  Runners, sold in 8-, 10- or 12-foot lengths, are made of light aluminum sheet metal that can be cut to fit easily enough with tin shears.  Tabs at the ends interlink and lock to extend the length.  Holes for hanger wires occur every 3 inches, and slots for cross Ts are positioned every 6 inches.  Edge framing is flexible enough to accommodate the slight irregularities in wall surfaces.  Use a utility knife to trim the panels.  Measuring Ceiling Height. Mark the proposed ceiling height-allowing room below the joists to clear ducts, pipes or other obstructions-on the wall at the corners of the room.  In each corner, drive a nail part-way into a stud at the level marked.  Stretch a chalk line tautly between the nails, and snap the line across each wall. Installing Edge Framing. Screw or nail edge framing into studs along each wall at ceiling height.  Where the ends of two strips of framing meet at a corner, lap one end over the other. Positioning Runners And Cross Ts. To ensure a symmetrical arrangement of the panels, start by marking the centers of the walls at joist level.  Since the short ends of the panels will about the walls parallel to the joists, these walls must be divided into centered 2-foot intervals.  Measure from center to corner, and determine the distance in inches beyond the last even number of feet.  If this overage is 6 inches or more (top right), snap a chalk line across the joists bottoms from the center of one wall to center of the center of the other.  If the overage is less than 6 inches, mark the joists along a line a foot to one side or the other of the midpoints (bottom right).  In either case, mark across the joists at 2-foot intervals on both sides of the first line. In centering the long dimension of the panels on the walls perpendicular to joists, measure in the same way from center to corner.  The overage is the distance to the corner from the last 4-, 8-, or 12-foot mark.  If the average is 6 inches or more (top right), plan to space cross Ts at 4-foot intervals on both sides of the center mark.  If the overage is less than 6 inches (bottom right), space cross Ts from points 2 feet on either side of the center.  Mark the walls above the edge framing for cross Ts.  Attaching Runners. Along the lines marked across the joists, attach an eye screw to the bottom edge of every other joist; attach an eye screw to the bottom edge of every other joist.  Insert a hanger wire in each eye, secure the wires by twisting and bend the free ends to a 90Β° angle.  Ensure alignment of the cross.  T slots in the runners by stretching a line between center marks on the walls perpendicular to the joists.  Hang the runners so that a t slot lies just above the string.  Add lengths of runners as needed and cut off the excess.  Set each runner in place with its ends resting on the edge framing.  Thread hanger wires through the holes in the runners.  Level each runner by adjusting the hanger wires, then secure each wire by twisting it around itself. Connecting The Cross Ts. Connect the runners with cross Ts at the proper intervals by fitting the ends of the cross Ts into the slots in the runners along the two walls perpendicular to the joists; rest the outer ends of the cross Ts on the edge framing.Install panels in all the full-sized openings in the grid.  Lift each panel diagonally up through the framework, […]

Materials and Equipment
Paint services

Materials and Equipment

Materials and Equipment This is an excerpt from the Book called “The Paint Effects BibleΒ 100 recipes for faux finishesΒ “Β  by Kerry Skinner. Continue reading to learn more about Basic Materials and Equipment, thanks to the author. Few mediums are more versatile than paint, but to take full advantage, of it you need the correct tools and equipment, and some idea of how to use them.Β  Don’t splash out needlessly on toolsβ€”it is better to work with a few familiar ones than to assemble a large, costly collection that never gets used.Β  Only gets used. Only a small number of specialist items are required to produce the paint effects that follow, and most of the materials are widely available in DIY stores or artist’s supply shops.Β  Paints, Glazes, and StainersΒ  Paint is made up of three main ingredients: pigment, binder, and a medium.Β  The pigment provides color and covering power; the binder causes adhesion to the surface; and the medium allows the application;Β  Today’s paint is either water-or oil-based.Β  Water-based products are preferable in many ways as they are non-toxic, odorless, and environmentally safe (although they must be disposed of in accordance with local waste regulations).Β  Oil paints, also known as alkyd paints, dry more slowlyβ€”a boon for beginnersβ€”and give a more durable finish.Β  A glaze is the transparent layer of color used over a base coat.Β  The general rule is: use an oil glaze over a latex base coat.Β  Color strainer (or tinder) is a concentrated coloring agent.Β  If you wish to use it for hand painting, it must be mixed with a medium that has commonly encountered types of paint.Β  The list that follows describes some of the most commonly encountered types of paint.Β  Remember that properties vary widely between makes.Β  For best results always follow the manufacturer’s instructions.Β  Acrylic primer is water based and used for sealing and covering wood and fiberboard surfaces.Β  Oil-based undercoat is an undercoat and primer combined, used before applying the base coat, especially on wood.Β  Latex paint is water based and available in matte (flat) and satin (mid-sheen) finishes.Β  Stencil paint is a water-based pain that generally flows better than latex paints, and is available in metallic and glitter colors.Β  It can also be used as a strainer.Β  paint and brush Wood paint is a matte, opaque paint specially formulated for wood.Β  It is self-priming, has a high chalk and pigment content, and can also be diluted with water to create a wash for bare wood.Β  Casein (or milk) paint is a water-soluble paint with a soft finish similar to lime wash that gives a β€œdusty β€œappearance.Β  Excellent for use on furniture and walls, it needs an additional coat if used in an exposed area.Β  See right for recipe to make your own.Β  Oil-based paint comes in gloss, satin (mid-sheen), and eggshell (semi-matte) finishes.Β  Gloss is used as a finishing coat on woodwork.Β  Satin and eggshell are used on woodwork and can be used on walls wherever general wear and tear is likely.Β  They are all wipe able.Β  Acrylic eggshell paint is a more user-friendly version of oil-based eggshell, with substantially less odor.Β  Metallic paints are widely available in tubes, pots, and spray cans.Β  New acrylic products are also available offering a range of iridescent, opalescent, and interference colors.Β  These offer unusual shimmering effects that are quite transparent.Β  Color wash is a specially formulated, water-based, translucent, colored glaze containing glycol retardants.Β  See right for recipe to make your own.Β  Matte latex glaze is a water-based product used to thin color and to act as a protective top-coat sealant.Β  Acrylic glaze is non-yellowing, and water- and heat-resistant.Β  It is tinted with acrylic colors for decorative glaze work.Β  Water-based, it gives a short working time, about 15 to 30 minutes.Β  Transparent oil glaze is used for oil-based paint-effect glazing.Β  It gives more working time but tends to yellow with age.Β  Dilute with mineral spirits.Β  Β Artist’s oil paints are used for tinting oil glazes for broke.Β  Color work and oil-based marbling effects.Β  You could use universal tinkers as an environmentally friendly alternative to artist’s oil paints.Β  Universal stainer or universal tinter can be added to any paint or varnish.Β  The strength of color obtained will depend upon the medium being tinted and the amount of white within that medium.Β  As a general rule, add the tinter a drop or two at a time, monitoring the results as you work. Textured Paint and PlastersΒ  Exterior house paint comes in smooth or rough finishes and can be used for some plaster or stone effects.Β  Textured wall finish is available commercially and comes in powder form.Β  It is a mix of quartz, clays, and cellulose.Β  It can be added to matte latex paint by the spoonful.Β  See left for recipe to make your own.Β  Alternative plasters such as stucco or marmorino plaster are available for those with more specialist knowledge and an understanding of their application.Β  The finish is harder and can be polished to give a smooth, soft gleam.Β  Natural clay plasters can be mixed with water into a workable consistency and will adhere to most surfaces if prepared properly.Β  They are best used over a breathable surface.Β  Paint Specialist materialsΒ  Metal leaf is available in gold, silver, copper, and a range of metal alloys or Dutch leaf (imitation gold or silver).Β  Most metal leaf is available either loose r in transfer leaf form.Β Β Β  Transfer leaf is used for oil-gilding.Β  Whilst easy to handle and cut owing to a waxed tissue backing paper, it may not retain the luster of loose leaf.Β  Loose leaf was traditionally used for water-gilding as it can be burnished to a high sheen.Β  It is slightly larger than transfer leaf, but it can be trickier to apply.Β  Bronze and metallic powders are made from metal alloys.Β  Flakes of mica or celluloid can be used to create sparkle or luster colors such as opalescent paint.Β  Rabbit-skin (gilding) size is a specialist, water-based glue with a milky consistency.Β  It is used in gilding and […]

Scroll to Top